# Консольные инструменты
# Tmux
## Настройка
**Tmux** можно настроить как для текущего пользователя(**~/.tmux.conf**) так и для всей системы.
С версии 2.1 для включения режима мыши (прокручивание, изменение размера панели, выбор панели и др.) нужно добавить в **tmux.conf** строку:
`set -g mouse on`
До версии 2.1 это было так:
```
set -g mouse-resize-pane on
set -g mouse-select-pane on
set -g mouse-select-window on
set -g mode-mouse on
```
## Работа с tmux
Для работы с **tmux** используется широкий набор горячих клавиш, состоящих из базового сочетания `Ctrl + b` и отдельных целевых клавиш: n,p,w,b и т.д.
### Работа с сеансами в tmux
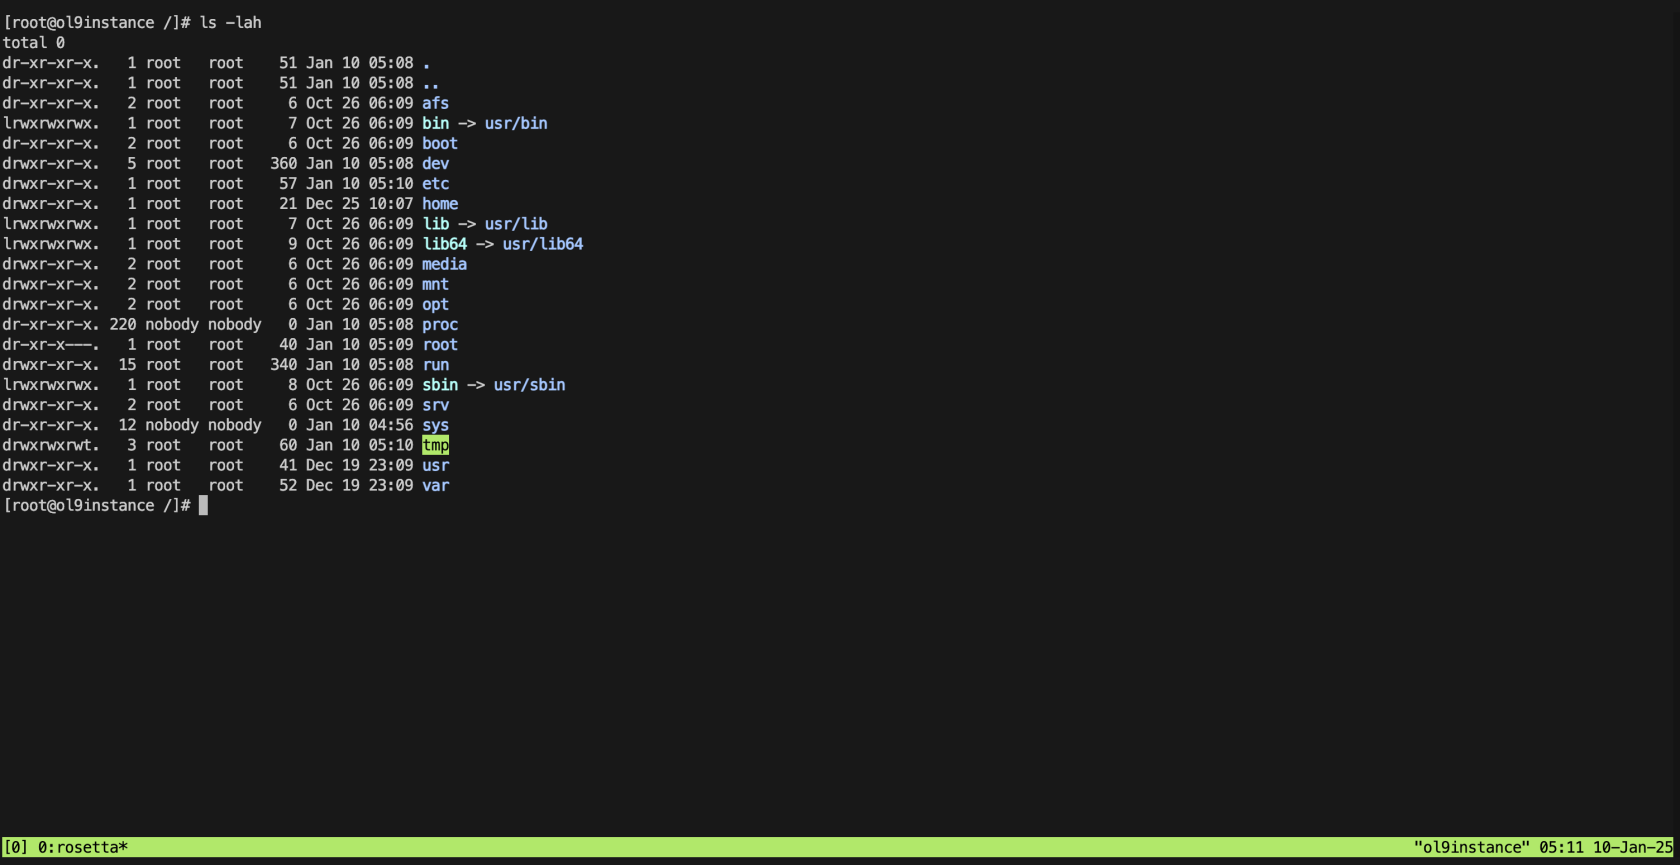
Для создания рабочего сеанса без идентификатора — достаточно ввести `tmux` в терминале. Будет создан сеанс 0:
[](https://docs.nix-adm.ru/uploads/images/gallery/2025-01/izobrazenie.png)
Идентификатор сеанса отображается внизу слева в квадратных скобках. Для создания именного сеанса достаточно ввести команду `tmux new -s название сеанса`.
Поскольку **tmux** завершает соединение с сохранением состояния сеанса, правильным способом возобновить работу **tmux** будет его запуск командой `tmux attach || tmux new`.
Команда запускает проверку уже созданных сеансов и если активных подключений нет — создается новое подключение.
Просмотреть список созданных сеансов можно командой `tmux ls`.
Команда вернёт список вида `0: 1 windows (created Mon Aug 30 13:02:31 2021) (attached)`.
Если в списке один сеанс, то командой `tmux attach` он будет автоматически восстановлен, а если в списке несколько сеансов — необходимо ввести команду `tmux attach -t наименование сеанса`.
В нашем случае сеанс называется 0.
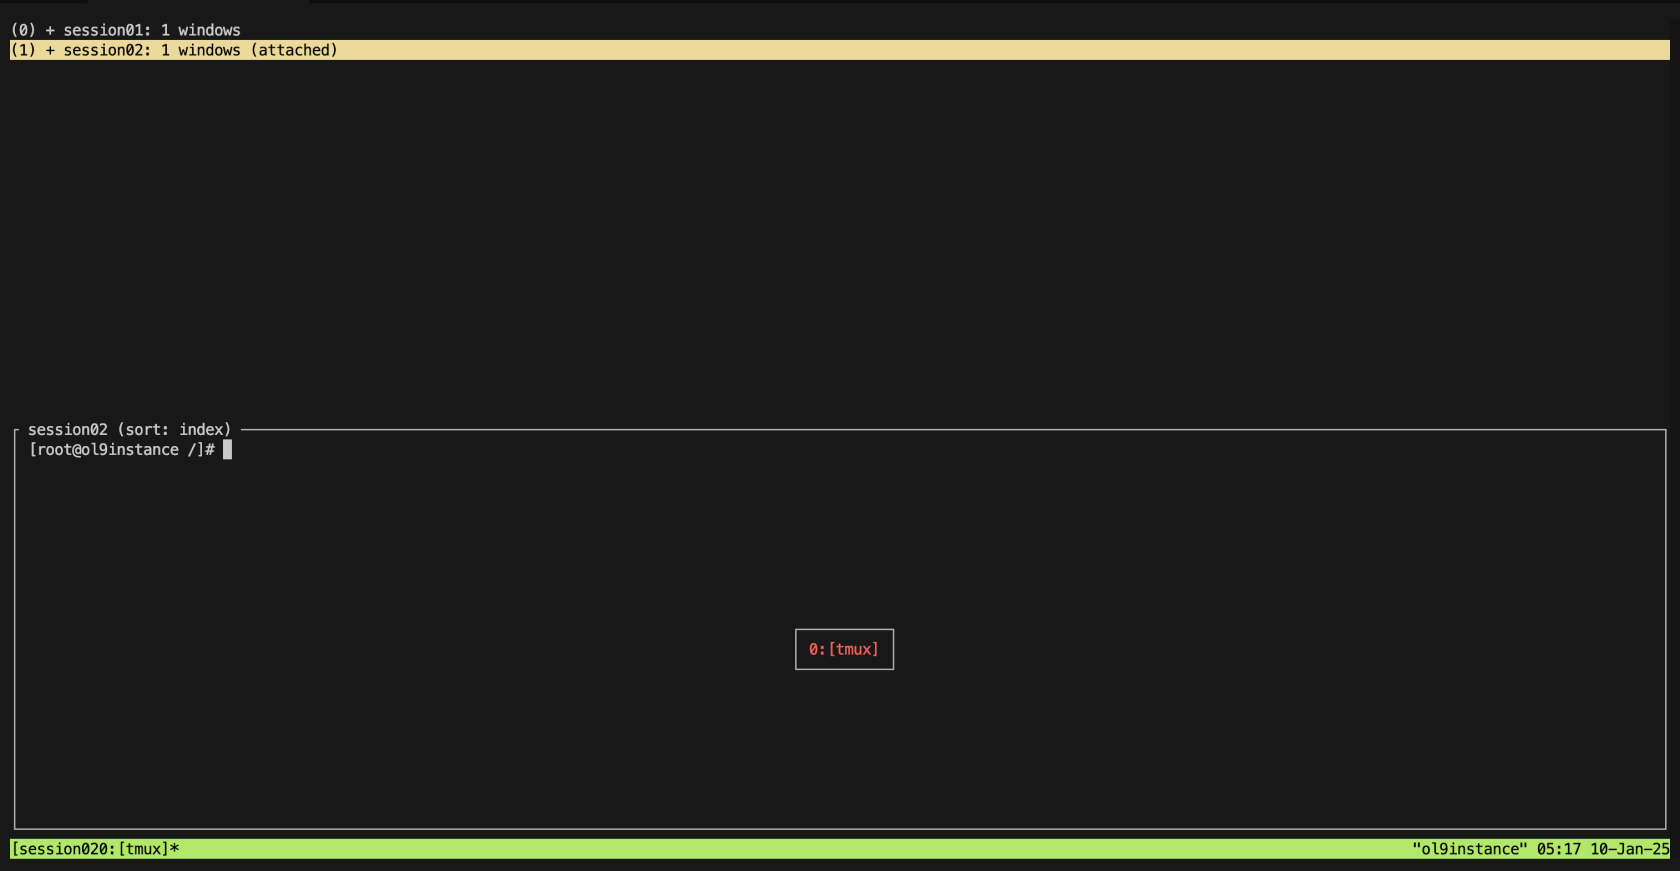
Сменить сеанс можно также, находясь в другом сеансе. Для этого нужно воспользоваться сочетанием клавиш `Ctrl + b, s`.
[](https://docs.nix-adm.ru/uploads/images/gallery/2025-01/lCcizobrazenie.png)
Выйти из сеанса можно с помощью сочетания клавиш `Ctrl + b, d`, а завершить его командой `tmux kill-session -t название сеанса`.
Закрыть все сеансы можно командой `tmux kill-server`.
### Создание окон и переключение между ними
Чтобы создать окно — применяется сочетание клавиш: `Ctrl + b`, а затем `c`. Просмотреть список окон можно сочетанием — `Ctrl + b`, а затем `w`. Выбор конкретного окна из списка осуществляется стрелками ↑ и ↓.
Переключиться между окнами можно с помощью следующих сочетаний клавиш:
- `Ctrl + b, n` — следующее окно;
- `Ctrl + b, p` — предыдущее окно;
- `Ctrl + b, номер окна (цифрой )` — переключиться на нужное окно.
### Горизонтальное и вертикальное деление окон
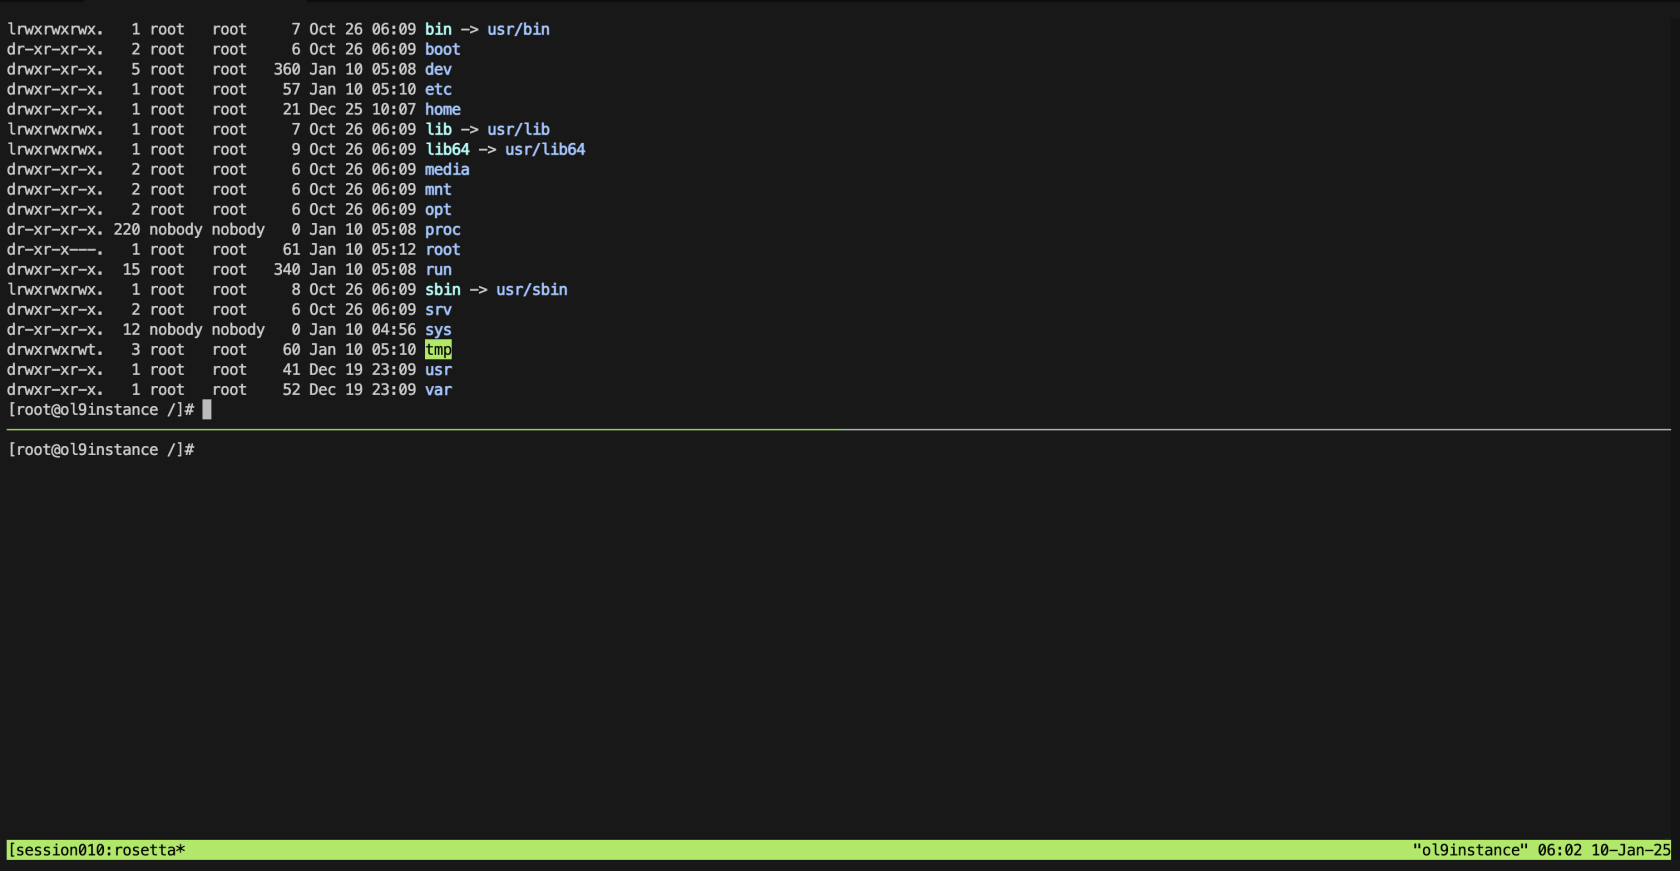
Окна сеансов **tmux** можно разделять вертикально и горизонтально. Для горизонтального разделения окна используется сочетание клавиш `Ctrl + b, "`.
[](https://docs.nix-adm.ru/uploads/images/gallery/2025-01/07hizobrazenie.png)
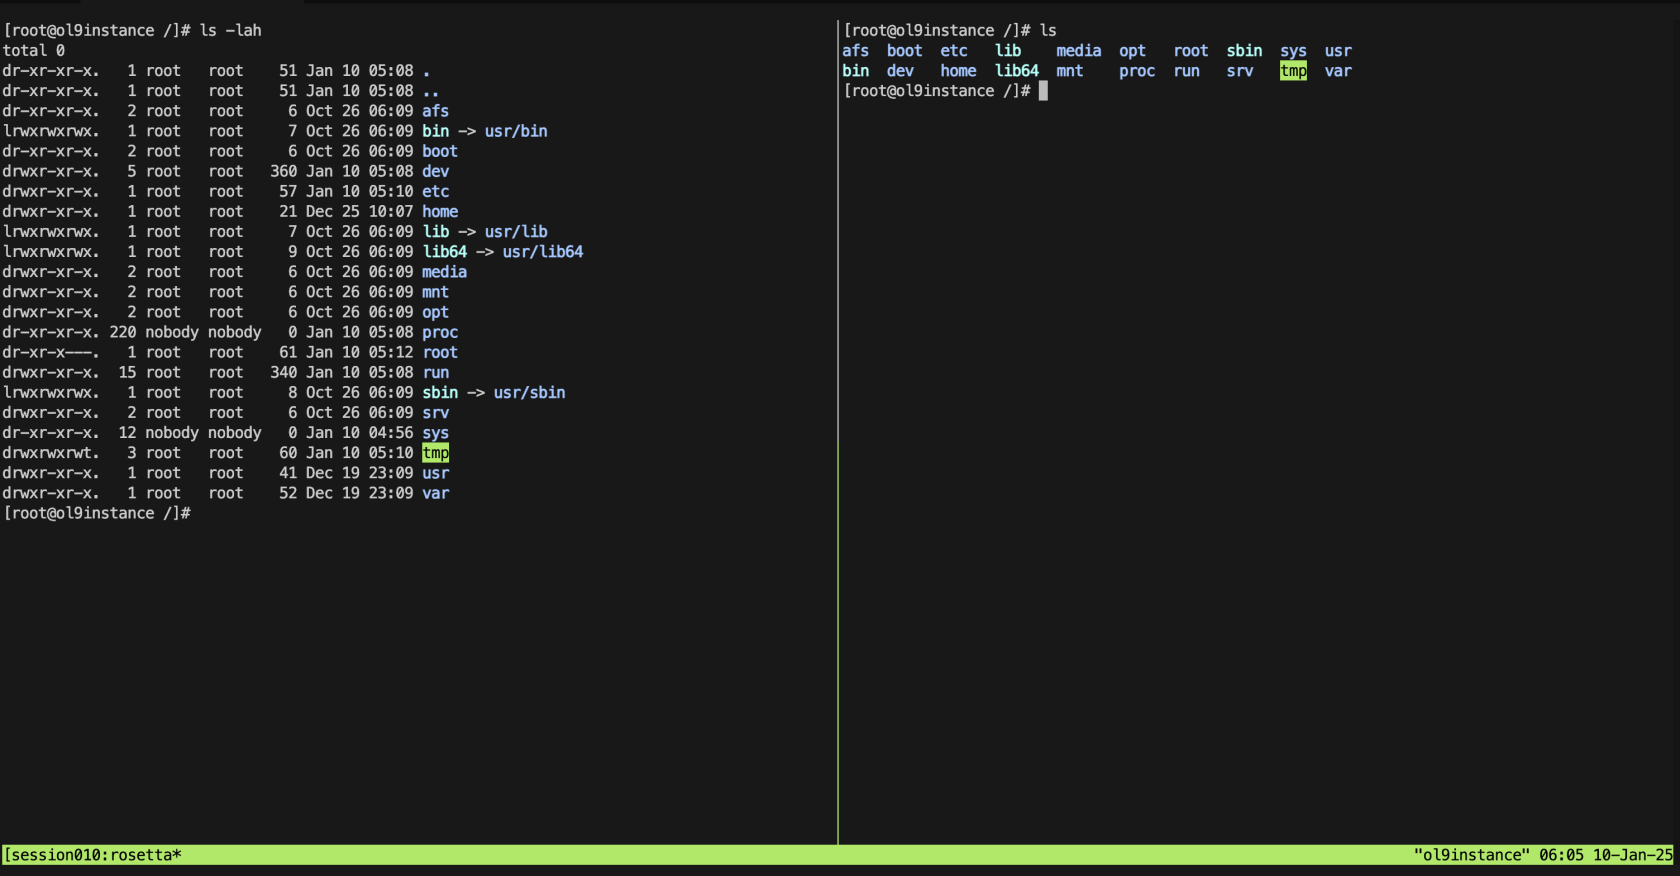
Чтобы разделить окно вертикально на две равные панели — воспользуйтесь сочетанием клавиш `Ctrl + b, %`.
[](https://docs.nix-adm.ru/uploads/images/gallery/2025-01/1jSizobrazenie.png)
Перемещаться между панелями можно с помощью сочетаний клавиш `Ctrl + b` и стрелок.
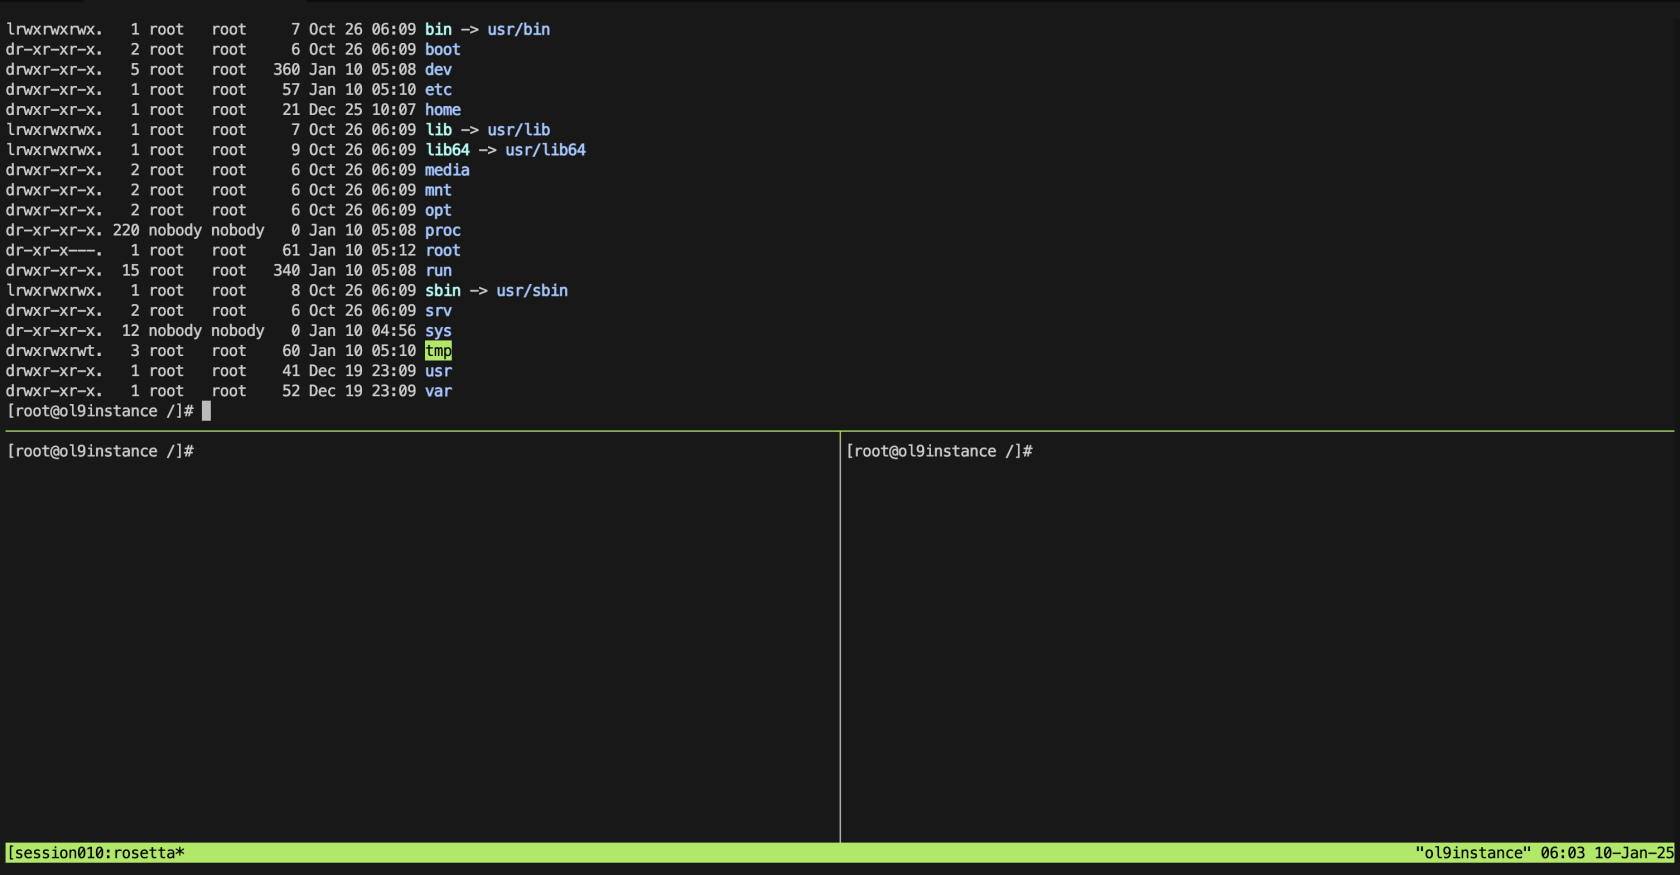
Панели тоже можно разделять. Например, если нужно получить 3 панели, сначала окно делится горизонтально (`Ctrl + b,"`), затем осуществляется переход на нужную панель (`Ctrl + b, ↑ или ↓`) и она делится вертикально (`Ctrl + b, %`). Получаем следующую рабочую зону:
[](https://docs.nix-adm.ru/uploads/images/gallery/2025-01/dqoizobrazenie.png)
Закрыть панель (часть окна) можно с помощью сочетания клавиш `Ctrl + b, x` или командой `exit`.
Команд и горячих клавиш **tmux** немало, но при ежедневной практике они довольно быстро выучиваются, однако новички поначалу путаются в них, поэтому мы составили список часто используемых команд и горячих клавиш **tmux**, и положили их в одно место.
### Список часто используемых команд и горячих клавиш tmux
**Команды для управления сеансами**:
- `tmux new [имя_сеанса]` — начать новый сеанс. `Имя_сеанса` опционально;
- `tmux attach -t [имя_сеанса]` — подключиться к уже существующему сеансу. Если имя заранее не было задано, тогда команда будет выглядеть так: `tmux attach -t 0`;
- `tmux ls` — список открытых сеансов tmux;
- `tmux kill-server` — остановить все запущенные сеансы;
- `tmux kill-session -t [имя_сеанса]` — завершить сеанс;
- `tmux list-clients -t [имя_сеанса]` — посмотреть клиентов, подключенных к сеансу;
- `tmux list-sessions` — вывести список всех запущенных сеансов.
**Горячие клавиши для управления окнами**:
- `Ctrl + b, c` — создать новое окно;
- `Ctrl + b, w` — просмотреть список окон;
- `Ctrl + b, n` — следующее окно;
- `Ctrl + b, p` — предыдущее окно;
- `Ctrl + b, номер окна (цифрой)` — переключиться на нужное окно;
- `Ctrl + b, "` — горизонтальное разделение окна;
- `Ctrl + b, %` — вертикальное разделение окна.
- `Ctrl + b, ,` — переименовать окно.
**Горячие клавиши для просмотра журнала команд и поиска:**
- `Ctrl + b, [` — вход в режим просмотра журнала команд.
- `Ctrl + b, [``Ctrl + s` — прямой поиск. Нажатие клавиши `n` подсвечивает следующий результат поиска.
- `Ctrl + b, [``Ctrl + r` — обратный поиск. Нажатие клавиши `n` подсвечивает следующий результат поиска.
С уверенностью можно сказать, что **tmux** — это простой и мощный консольный инструмент, позволяющая полностью настроить под себя рабочие пространство в терминале. Сила **tmux** в его гибкости и сочетании с другими консольными инструментами, например: VIM, Htop, Tree.
## Дополнения
### Установка
Установка дополнений в tmux может быть несколькими способами:
- **Управляющий дополнениями(Tmux Plugin Manager).**
- **Загрузка из репозитория.**
### Tmux Plugin Manager
Tmux Plugin Manager автоматизирует процесс загрузки и управления дополнениями из вашего файла настроек.
#### Установка TPM
Загрузите TPM репозиторий в каталог `~/.tmux/plugins/tpm`
```bash
$ git clone https://github.com/tmux-plugins/tpm ~/.tmux/plugins/tpm
```
#### Настройка TPM
Добавьте TPM в ваш файл настроек.
```
~/.tmux.conf
# List of plugins
set -g @plugin 'tmux-plugins/tpm'
set -g @plugin 'tmux-plugins/tmux-sensible'
# Add other plugins here (e.g., 'tmux-plugins/tmux-resurrect')
# Initialize TMUX plugin manager (keep this line at the very bottom)
run '~/.tmux/plugins/tpm/tpm'
```
#### Загрузка и установка дополнений
После внесения изменений в ваш файл настроек сделайте следующие действия:
1. **Обновите настройки:** Запустите в терминале `tmux source ~/.tmux.conf`
2. **Установите дополнения:** В работающем сеансе нажмите `Ctrl + b, I`. `I` должна быть заглавной.
TPM загрузит дополнения в ваш каталог с дополнениями и подключит их автоматически.
#### Сочетания быстрых клавиш
**Сочетания быстрых клавиш для работы с TPM:**
- `Ctrl + b, I` – установка новых дополнений и обновление настроек окружения.
- `Ctrl + b, U` – обновление существующих дополнений.
- `Ctrl + b, Alt + u` – удаление дополнений вне списка файла настроек.
### Tmux Resurrect
[**Tmux Resurrect**](https://github.com/tmux-plugins/tmux-resurrect) – дополнение для восстановления окружения tmux после перезапуска.
#### Установка через TPM
Добавьте дополнение в ваш файл настроек.
```
~/.tmux.conf
set -g @plugin 'tmux-plugins/tmux-resurrect'
```
Нажмите `Ctrl + b, I` для загрузки и включения дополнения.
#### Применение
**Сочетания быстрых клавиш для работы с** **TR:**
- `Ctrl + b, Ctrl + s` – сохранить окружение.
- `Ctrl + b, Ctrl + r` – восстановить окружение.
# Curl
## Step 1 — Fetching remote files
Out of the box, without any command-line arguments, the `curl` command will fetch a file and display its contents to the standard output.
Let’s give it a try by downloading the `robots.txt` file from [Digitalocean.com](http://Digitalocean.com):
```bash
$ curl https://www.digitalocean.com/robots.txt
```
You’ll see the file’s contents displayed on the screen:
```bash
Output
User-agent: *
Disallow:
sitemap: https://www.digitalocean.com/sitemap.xml
sitemap: https://www.digitalocean.com/community/main_sitemap.xml.gz
sitemap: https://www.digitalocean.com/community/questions_sitemap.xml.gz
sitemap: https://www.digitalocean.com/community/users_sitemap.xml.gz
```
Give `curl` a URL and it will fetch the resource and display its contents.
### Saving Remote Files
Fetching a file and displaying its contents is all well and good, but what if you want to actually save the file to your system?
To save the remote file to your local system, with the same filename as the server you’re downloading from, add the `--remote-name` argument, or use the `-O` option:
```bash
$ curl -O https://www.digitalocean.com/robots.txt
```
Your file will download:
```bash
Output
% Total % Received % Xferd Average Speed Time Time Time Current
Dload Upload Total Spent Left Speed
100 286 0 286 0 0 5296 0 --:--:-- --:--:-- --:--:-- 5296
```
Instead of displaying the contents of the file, `curl` displays a text-based progress meter and saves the file to the same name as the remote file’s name. You can check on things with the `cat` command:
```bash
$ cat robots.txt
```
The file contains the same contents you saw previously:
```bash
Output
User-agent: *
Disallow:
sitemap: https://www.digitalocean.com/sitemap.xml
sitemap: https://www.digitalocean.com/community/main_sitemap.xml.gz
sitemap: https://www.digitalocean.com/community/questions_sitemap.xml.gz
sitemap: https://www.digitalocean.com/community/users_sitemap.xml.gz
```
Now let’s look at specifying a filename for the downloaded file.
## Step 2 — Saving Remote Files with a Specific File Name
You may already have a local file with the same name as the file on the remote server.
To avoid overwriting your local file of the same name, use the `-o` or `--output` argument, followed by the name of the local file you’d like to save the contents to.
Execute the following command to download the remote `robots.txt` file to the locally named `do-bots.txt` file:
```bash
$ curl -o do-bots.txt https://www.digitalocean.com/robots.txt
```
Once again, you’ll see the progress bar:
```bash
Output
% Total % Received % Xferd Average Speed Time Time Time Current
Dload Upload Total Spent Left Speed
100 286 0 286 0 0 6975 0 --:--:-- --:--:-- --:--:-- 7150
```
Now use the `cat` command to display the contents of `do-bots.txt` to verify it’s the file you downloaded:
```bash
$ cat do-bots.txt
```
The contents are the same:
```bash
Output
User-agent: *
Disallow:
sitemap: https://www.digitalocean.com/sitemap.xml
sitemap: https://www.digitalocean.com/community/main_sitemap.xml.gz
sitemap: https://www.digitalocean.com/community/questions_sitemap.xml.gz
sitemap: https://www.digitalocean.com/community/users_sitemap.xml.gz
```
By default, `curl` doesn’t follow redirects, so when files move, you might not get what you expect. Let’s look at how to fix that.
## Step 3 — Following Redirects
Thus far, all of the examples have included fully qualified URLs that include the `https://` protocol. If you happened to try to fetch the `robots.txt` file and only specified `www.digitalocean.com`, you would not see any output, because DigitalOcean redirects requests from `http://` to `https://`:
You can verify this by using the `-I` flag, which displays the request headers rather than the contents of the file:
```
$ curl -I www.digitalocean.com/robots.txt
```
The output shows that the URL was redirected. The first line of the output tells you that it was moved, and the `Location` line tells you where:
```
Output
HTTP/1.1 301 Moved Permanently
Date: Wed, 18 Mar 2026 05:27:02 GMT
Content-Length: 0
Connection: keep-alive
CF-RAY: 9de1d370fd80c537-BLR
location: https://www.digitalocean.com/robots.txt
CF-Cache-Status: MISS
Expires: Wed, 18 Mar 2026 07:27:02 GMT
Cache-Control: public, max-age=7200
Server: cloudflare
. . .
```
You could use `curl` to make another request manually, or you can use the `--location` or `-L` argument which tells `curl` to redo the request to the new location whenever it encounters a redirect. Give it a try:
```bash
$ curl -L www.digitalocean.com/robots.txt
```
This time, you see the output as `curl` followed by the redirect:
```bash
Output
User-agent: *
Disallow:
sitemap: https://www.digitalocean.com/sitemap.xml
sitemap: https://www.digitalocean.com/community/main_sitemap.xml.gz
sitemap: https://www.digitalocean.com/community/questions_sitemap.xml.gz
sitemap: https://www.digitalocean.com/community/users_sitemap.xml.gz
```
You can combine the `-L` argument with some of the aforementioned arguments to download the file to your local system:
```bash
$ curl -L -o do-bots.txt www.digitalocean.com/robots.txt
```
**Warning**: Many resources online will ask you to use `curl` to download scripts and execute them. Before you run any scripts you have downloaded, it’s good practice to check their contents before making them executable and running them. Use the `less` command to review the code to ensure it’s something you want to run.
## Step 4 — Downloading Files with Authentication
Some web files are protected and require authentication. `curl` allows you to handle these cases easily. This is particularly useful when working with [proxy servers](https://www.digitalocean.com/community/tutorials/how-to-set-up-dante-proxy-on-ubuntu-20-04) or secure API endpoints.
### Basic Authentication (Username & Password)
To access a file that requires login credentials, use the `-u` flag:
```bash
$ curl -u username:password -O https://example.com/securefile.zip
```
### Token-Based Authentication
You can also use headers to pass API tokens:
```bash
$ curl -H "Authorization: Bearer YOUR_TOKEN" -O https://api.example.com/protected/data.json
```
For better security, avoid hardcoding sensitive data. Instead, use environment variables or configuration files.
## Step 5 — Handling Timeouts, Retries, and Resuming Downloads
Robust scripts need to account for network interruptions and delays.
### Resume Interrupted Downloads
Use the `-C -` option to resume:
```bash
$ curl -C - -O https://example.com/largefile.iso
```
### Set Timeouts
Prevent `curl` from hanging indefinitely:
```bash
$ curl --max-time 30 -O https://example.com/file.txt
```
### Retry Failed Downloads
Automatically retry failed downloads up to 3 times:
```bash
$ curl --retry 3 -O https://example.com/file.txt
```
## Step 6 — Automating Downloads with Shell Scripts
Automating downloads can be useful in CI/CD pipelines or regular backups. This is especially relevant when working with [Node.js applications](https://www.digitalocean.com/community/tutorials/how-to-install-node-js-on-ubuntu-22-04) or [REST APIs](https://www.digitalocean.com/community/tutorials/create-a-rest-api-using-flask-on-ubuntu) that require regular data updates.
### Sample Script
```bash
#!/bin/bash
URL="https://example.com/file.zip"
DEST="/home/user/downloads/file.zip"
curl -L -o "$DEST" "$URL"
```
Make the script executable with `chmod +x script.sh`, then schedule it with `cron` or use it in a deployment pipeline.
## Step 7 — Troubleshooting Common Download Issues
Sometimes downloads might fail or behave unexpectedly. Here are some common issues and their solutions:
### File Not Downloading
If `curl` isn’t downloading your file, try these troubleshooting steps:
```bash
$ curl -I https://example.com/file.zip
```
Verify if the server requires a specific user agent:
```bash
$ curl -A "Mozilla/5.0" -O https://example.com/file.zip
```
Check for SSL/TLS issues:
```bash
$ curl -v -O https://example.com/file.zip
```
Try with different protocols if available:
```bash
$ # Try HTTP if HTTPS fails
$ curl -O http://example.com/file.zip
```
Check if the file exists and you have permissions:
```bash
$ curl -u username:password -O https://example.com/file.zip
```
If you’re still having issues, the verbose output (`-v`) will help identify the problem:
```bash
$ curl -v -O https://example.com/file.zip
```
## Step 8 — Using wget as an Alternative
While `curl` is powerful, sometimes `wget` might be a better choice for certain download scenarios. `wget` is specifically designed for downloading files and has some features that make it particularly useful:
### Basic wget Usage
To download a file with `wget`:
```bash
$ wget https://example.com/file.zip
```
### Key wget Features
Automatic retry on failure:
```bash
$ wget -t 3 https://example.com/file.zip
```
Download in the background:
```bash
$ wget -b https://example.com/file.zip
```
Limit download speed:
```bash
$ wget --limit-rate=200k https://example.com/file.zip
```
Download entire websites:
```bash
$ wget --mirror --convert-links --adjust-extension --page-requisites --no-parent https://example.com
```
### When to Choose wget over curl
- When you need recursive downloading
- For mirroring entire websites
- When you want automatic retry functionality
- For simpler download commands (wget has fewer options to remember)
### When to Stick with curl
- When you need to interact with APIs
- For more complex HTTP requests
- When you need to send data to servers
- For better script integration
## FAQs
### 1. What is the difference between -O and -o in cURL?
The `-O` (uppercase “o”) option in `curl` saves the downloaded file using the original filename as provided by the server in the URL or HTTP headers. This is particularly useful when you want to preserve the server’s naming convention, or when downloading multiple files in a batch without having to specify each filename manually.
On the other hand, the `-o` (lowercase “o”) option allows you to specify a custom filename for the downloaded file. This is helpful for organizing your downloads, preventing filename collisions, or when you want to give the file a more meaningful name locally.
Example:
```bash
$ curl -O https://example.com/file.zip # Saves as file.zip
$ curl -o custom-name.zip https://example.com/file.zip # Saves as custom-name.zip
```
### 2. How do I resume an interrupted download with cURL?
If your download was interrupted due to a network error or system reboot, you can resume it using the `-C -` option. This tells `curl` to continue the download from where it left off, assuming the server supports HTTP range requests.
Example:
```bash
$ curl -C - -O https://example.com/largefile.iso
```
This is particularly useful for large ISO files or multi-gigabyte datasets, especially when working with unreliable internet connections or automating downloads in scripts.
### 3. Can I download files behind authentication with cURL?
Yes, `curl` supports both basic and token-based authentication methods.
For basic authentication using a username and password:
```bash
$ curl -u username:password -O https://secure.example.com/file.zip
```
For token-based authentication, use the `Authorization` header:
```bash
$ curl -H "Authorization: Bearer YOUR_TOKEN" -O https://api.example.com/file.zip
```
Always avoid hardcoding sensitive credentials. Use environment variables or configuration files when scripting to enhance security.
### 4. What should I do if the download URL redirects?
Some URLs redirect from `http` to `https`, or from an old endpoint to a new one. By default, `curl` does not follow these redirects.
To handle this, add the `-L` or `--location` option:
```bash
$ curl -L -O http://example.com/download
```
This is especially important when accessing public APIs, shortened URLs, or migrating download links.
### 5. Is cURL available on Windows?
Yes, cURL is included by default in Windows 10 and later. You can use it directly from Command Prompt or PowerShell.
For older versions, or for enhanced Unix-like behaviour, you can install it via:
- [Git Bash](https://git-scm.com)
- [Cygwin](https://www.cygwin.com/)
- [Chocolatey](https://chocolatey.org/) with:
```bash
$ choco install curl
```
Once installed, you can run cURL commands just like on Linux or macOS. This enables cross-platform scripting and consistent development workflows.
### 6. How can I download multiple files at once with cURL?
You can download multiple files in a single command using either a list of URLs or a pattern. Here are two common approaches:
Using multiple URLs:
```bash
$ curl -O https://example.com/file1.zip -O https://example.com/file2.zip
```
Using a pattern with brace expansion:
```bash
$ curl -O https://example.com/file{1..5}.zip
```
For more complex scenarios, you can also use a text file containing URLs and the `-K` option:
```bash
$ # urls.txt contains one URL per line
$ curl -K urls.txt
```
### 7. How do I handle SSL/TLS certificate issues with cURL?
Sometimes, you might encounter SSL certificate errors when downloading from servers with expired or self-signed certificates (SSL). While not recommended for production use, you can bypass certificate verification using the `-k` or `--insecure` option:
```bash
$ curl -k -O https://example.com/file.zip
```
For a more secure approach, you can specify a custom certificate:
```bash
$ curl --cacert /path/to/certificate.pem -O https://example.com/file.zip
```
Remember that bypassing certificate verification can expose you to security risks, so use these options cautiously.
### 8. How can I monitor download progress and speed with cURL?
By default, cURL shows a progress bar, but you can customise the output using various options:
For a simple progress bar:
```bash
$ curl -# -O https://example.com/file.zip
```
For detailed progress information:
```bash
$ curl -w "\nDownloaded: %{size_download} bytes\nSpeed: %{speed_download} bytes/sec\nTime: %{time_total} seconds\n" -O https://example.com/file.zip
```
You can also create a custom progress format using the `-w` option with various variables like `%{speed_download}`, `%{time_total}`, and `%{size_download}`.